Exadata数据库一体机已经经过多年的风雨磨砺修炼为X5版本;在中国Exadata也有着众多的成功案例,基于Oracle原厂和众多服务商的努力,我们对Exadata的使用也越来越成熟。 这里Maclean有幸能接受Oracle的邀请,参与到Oracle Exadata原厂团队的热烈技术讨论中。
通过实践或与同事/同行交流汇聚了50条Exadata使用中的小技巧,不吝抛砖引玉:

Exadata管理
Exadata性能优化
让表使用flash cache
ALTER TABLE <object name> storage (CELL_FLASH_CACHE KEEP);
可以使用如下公式计算Exadata特性对IO的优化
[ 1 – {(cell physical IO interconnect bytes returned by smart scan)
/ (cell IO uncompressed bytes + cell physical IO bytes saved by storage index)} ] * 100
可以使用如下公式计算Exadata Storage Index对Disk IO减少的共享
(cell physical IO bytes saved by storage index / physical read total bytes) * 100
可以使用如下计算Flash Cache的使用率
(cell flash cache read hit / physical read total IO requests) * 100
收集cell级别的表缓存统计信息的方法
SQL> SELECT data_object_id FROM DBA_OBJECTS WHERE object_name=’EMP’;
OBJECT_ID
———
57435
CellCLI> LIST FLASHCACHECONTENT –
WHERE objectNumber=57435 DETAIL cachedSize: 495438874
dbID: 70052
hitCount: 415483
missCount: 2059
objectNumber: 57435
tableSpaceNumber: 1
确认在使用write back flash cache
#dcli -g ~/cell_group -l root cellcli -e “list cell attributes flashcachemode”
Results:
flashCacheMode: WriteBack -> write back flash cache is enabled
flashCacheMode: WriteThrough -> write back flash cache is not enabled
确认所有的griddisk均为正常online状态
# dcli -g cell_group -l root cellcli -e list griddisk attributes asmdeactivationoutcome, asmmodestatus
确认所有的flashdisk均为正常online状态
# dcli -g cell_group -l root cellcli -e list flashcache detail
启用write back flash cache的方法
A. Enable Write Back Flash Cache using a ROLLING method
(RDBMS & ASM instance is up – enabling write-back flashcache one cell at a time)
Log onto the first cell that you wish to enable write-back FlashCache
1. Drop the flash cache on that cell
# cellcli -e drop flashcache
2. Check if ASM will be OK if the grid disks go OFFLINE. The following command should return ‘Yes’ for the grid disks being listed:
# cellcli -e list griddisk attributes name,asmmodestatus,asmdeactivationoutcome
3. Inactivate the griddisk on the cell
# cellcli –e alter griddisk all inactive
4. Shut down cellsrv service
# cellcli -e alter cell shutdown services cellsrv
5. Set the cell flashcache mode to writeback
# cellcli -e “alter cell flashCacheMode=writeback”
6. Restart the cellsrv service
# cellcli -e alter cell startup services cellsrv
7. Reactivate the griddisks on the cell
# cellcli –e alter griddisk all active
8. Verify all grid disks have been successfully put online using the following command:
# cellcli -e list griddisk attributes name, asmmodestatus
9. Recreate the flash cache
# cellcli -e create flashcache all
10. Check the status of the cell to confirm that it’s now in WriteBack mode:
# cellcli -e list cell detail | grep flashCacheMode
11. Repeat these same steps again on the next cell. However, before taking another storage server offline, execute the following making sure ‘asmdeactivationoutcome’ displays YES:
# cellcli -e list griddisk attributes name,asmmodestatus,asmdeactivationoutcome
B . Enable Write Back Flash Cache using a NON-ROLLING method
(RDBMS & ASM instances are down while enabling write-back flashcache)
1. Drop the flash cache on that cell
# cellcli -e drop flashcache
2. Shut down cellsrv service
# cellcli -e alter cell shutdown services cellsrv
3. Set the cell flashcache mode to writeback
# cellcli -e “alter cell flashCacheMode=writeback”
4. Restart the cellsrv service
# cellcli -e alter cell startup services cellsrv
5. Recreate the flash cache
# cellcli -e create flashcache all
确认Exadata 计算节点间的网络带宽
可以采用nc nc-1.84-10.fc6.x86_64.rpm获得
检测多个ORACLE_HOME是否RDS可用?
dcli -g /opt/oracle.SupportTools/onecommand/dbs_group -l oracle md5sum ${ORACLE_HOME}/lib/libskgxp11.so
relink ORACLE_HOME的RDS
dcli -g /opt/oracle.SupportTools/onecommand/dbs_group -l oracle “export ORACLE_HOME=$ORACLE_HOME;;cd `pwd`;;make – f i*mk ipc_rds”
dcli -g /opt/oracle.SupportTools/onecommand/dbs_group -l oracle “export ORACLE_HOME=$ORACLE_HOME;;cd `pwd`;;make – f i*mk ioracle” | egrep ‘rm|mv.*oracle’
不同配置Exadata的推荐最大并行度
| 配置 | CPU个数 | 推荐最大Parallelism |
| Full Rack | 64 core | DOP=256 |
| Half Rack | 32 core | DOP=128 |
| Quarter Rack | 16 core | DOP=64 |
Exadata EHCC支持
Exadata的EHCC支持宽表 最大支持1000个字段的表,而不像11.1中的压缩仅支持最多255列的表
Exadata 压缩信息
通过dbms_compression.get_compression_ratio 可以获得表的压缩信息
针对写日志redo特别多的应用建议启用Smart Flash logging特性
CREATE FLASHLOG ALL
CREATE FLASHLOG ALL SIZE=1G
CREATE FLASHLOG CELLDISK=’fd1,fd2′
CREATE FLASHLOG CELLDISK=’fd1,fd2′ SIZE=1G
Exadata DB管理
Exadata存储空间计算
FreeMB(最大可用空间) =
GridDisk*12*Num of Cells/Redundancy
UsableMB (支持1个CELL故障的最大可用空间) =
GridDisk*12*(Num of Cells – 1) /Redundancy
查看cell软件版本
imagehistory
imageinfo
了解cell的温度
dcli -g cell_group -l root “ipmitool sensor | grep ‘Inlet Amb Temp'”
cell存储节点的日志存放位置
$ADR_BASE/diag/asm/cell/`hostname`/trace/alert.log $ADR_BASE/diag/asm/cell/`hostname`/trace/ms-odl.* $ADR_BASE/diag/asm/cell/`hostname`/trace/svtrc__0.trc — ps -ef | grep “cellsrv 100” $ADR_BASE/diag/asm/cell/`hostname`/incident/*
/var/log/messages*, dmesg /var/log/sa/*
/var/log/cellos/*
列出cell中的alert history
list alerthistory where notificationState like ‘[023]’ and severity like ‘[warning|critical]’ and examinedBy = NULL;
为cell创建一个告警阈值
cellcli
create threshold CD_IO_ERRS_MIN warning=1, comparison=’>=’, occurrences=1, observation=1;
cell可用性监控
一般建议使用 EMGC Oracle Exadata Storage Server Management Plug-In 监控
如何禁用Smart Scan?
设置 Cell_offload_processing=false
如何禁用storage index?
设置 _kcfis_storageidx_disabled=true
如何禁用flash cache?
11.2.0.2 以后 设置_kcfis_keep_in_cellfc_enabled=false
11.2.0.1中设置_kcfis_control1=1
cell相关的数据库视图有以下这些视图
select * from sys.GV_$CELL_STATE;
select * from sys.GV_$CELL;
select * from sys.GV_$CELL_THREAD_HISTORY;
select * from sys.GV_$CELL_REQUEST_TOTALS;
select * from sys.GV_$CELL_CONFIG;
配置Inter-Database IORM
CellCLI> alter iormplan –
dbplan = ((name = production, level = 1, allocation = 100), –
(name = test, level = 2, allocation = 80), –
(name = other, level = 2, allocation = 20))
IORMPLAN successfully altered
CellCLI> alter iormplan active
IORMPLAN successfully altered
CellCLI> list iormplan detail
name: cell4_IORMPLAN
catPlan:
dbPlan: name=production,level=1,allocation=100
name=test,level=2,allocation=80
name=other,level=2,allocation=20
status: active
如何禁用布隆过滤Bloom Fliter
设置_bloom_pruning_enabled=false
Exadata数据备份
backup备份速率
Exadata下rman备份的速率从1通道到8通道 大约为1003MB/s 到 2081MB/s,视乎配置不同也略微有区别
recovery应用日志恢复速率
exadata recovery的速率大约为每秒600~1000MB/s的归档日志
standby database搭建
对于50TB的standby database搭建,若使用infiniband + 4rman通道大约耗费5.5小时,若使用GigE则在18个小时左右
Exadata恢复
cell 救护
可以通过 /opt/oracle.SupportTools/make_cellboot_usb脚本创建内部USB cellboot_usb_in_rescure_mode
Exadata部署
onecommand下载
可以下载patch (9935478) ONECOMMAND FOR Exadata 11gR2
Exadata安装前准备工作
1. 下载安装介质包括Grid, Database,Patches等
2. 硬件设备到货验收并安装就绪
3. 规划DBM用的管理网,生产网,ILOM等用的网段和IP地址
4. 配置DNS服务器
5. 将IP地址和域名注册到DNS服务器
6. 配置NTP服务器
7. 网络连线
环境检查
1. 检查DBM主机的eth0网卡是否可以通过cisco交换机被访问
2. 检查hardware and firmware profile是否正确
3. 验证InfiniBand Network
验证网络连通性
- 登陆第一台数据库服务器使用sh脚本验证网络连通性
- 验证DNS是否正常
- 验证NTP 服务器是否正常
安装Exadata Storage Server Image Patch (root user)
1. 在db server和cell server上为root用户配置SSH
# /opt/oracle.SupportTools/onecommand/setssh.sh -s -u root -p password -n N -h dbs_group
2. 检查当前Cell storage server的Exadata Image 版本
3. 安装最新的Patch具体步骤详见Readme
4. 验证当前Exadata Image version
#cd /opt/oracle.SupportTools/firstconf
#dcli -l root -g quarter ‘imagehistory | grep –i Version
使用OneCommand工具完成DBM的配置安装
1. #cd /opt/oracle.SupportTools/onecommand
2. Display the onecommand steps
# ./deploy112.sh -i –l
3. The steps in order are…
Step 0 = ValidateThisNodeSetup
Step 1 = SetupSSHForRoot
Step 2 = ValidateAllNodes
Step 3 = UnzipFiles
Step 4 = UpdateEtcHosts
Step 5 = CreateCellipnitora
Step 6 = ValidateHW
Step 7 = ValidateIB
Step 8 = ValidateCell
Step 9 = PingRdsCheck
Step 10 = RunCalibrate
Step 11 = ValidateTimeDate
Step 12 = UpdateConfig
Step 13 = CreateUserAccounts
Step 14 = SetupSSHForUsers
Step 15 = CreateOraHomes
Step 16 = CreateGridDisks
Step 17 = InstallGridSoftware
Step 18 = RunGridRootScripts
Step 19 = Install112DBSoftware
Step 20 = Create112Listener
Step 21 = RunAsmCa
Step 22 = UnlockGIHome
Step 23 = UpdateOPatch
Step 24 = ApplyBP
Step 25 = RelinkRDS
Step 26 = LockUpGI
Step 27 = SetupCellEmailAlerts
Step 28 = RunDbca
Step 29 = SetupEMDbControl
Step 30 = ApplySecurityFixes
Step 31 = ResecureMachine
To run a command
#./deploy112.sh –i –s N
Where N corresponds to a step number
Example to run step 0
Exadata监控
exachk健康检查脚本
exachk脚本可以以daemon形式后台运行
./exachk –d start
以daemon形式cluster support运行
./exachk –clusternodes [node1,[node N]] –d start!
Exadata文档信息
Exadata的官方文档 http://docs.oracle.com/cd/E50790_01/welcome.html
另外文档还保存在您cell 的 /opt/oracle/cell/doc/ 目录下。
Exadata硬件篇
常规
默认密码,以下是Exadata中cell/db node IB等的默认密码:
| 组件 | 登陆 | 默认密码 |
| Storage Cells | root nm2user | welcome1 |
| Infiniband Switch | root nm2user | welcome1 changeme |
| DB节点 | root | welcome1 |
| CELL CLI | celladmin | welcome |
| ILOM | root | welcome1 |
| KVM Switch | Admin or none | <none> |
| GigE switch | <none> | <none> |
初始安装后asmsnmp的账号一般也是welcome1
硬件常规巡检:
在机房例行检查时,需要从Exadata机箱后方查看Exadata中是否有黄灯报警,如果有,记录位
置,即时登录OEM/ILOM/集成的第三方监控工具查明原因,定位部件,即时维护。
Exadata一体机健康检查脚本exachk,参考document 1070954.1
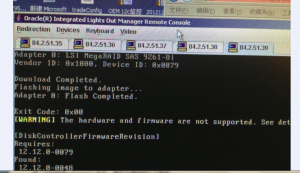
检测Exadata数据库机器上的硬件和固件版本是否匹配?
/opt/oracle.SupportTools/CheckHWnFWProfile
返回如下结果说明版本匹配:
[SUCCESS] The hardware and firmware profile matches one of the supported profile
检测软件版本与平台是否匹配?
/opt/oracle.SupportTools/CheckSWProfile.sh -c
为cell启用邮件告警
ALTER CELL smtpServer=’mailserver.maildomain.com’, – smtpFromAddr=’firstname.lastname@maildomain.com’, –
smtpToAddr=’firstname.lastname@maildomain.com’, –
smtpFrom=’Exadata cell’, –
smtpPort='<port for mail server>’, – smtpUseSSL=’TRUE’, – notificationPolicy=’critical,warning,clear’, – notificationMethod=’mail’;
alter cell validate mail;
监控 磁盘故障
当通过机房例行检查发现硬件黄灯警告或通过监控工具(命令行/ILOM/第三方工具)发现故
障并确定位置后,可进行更换操作。
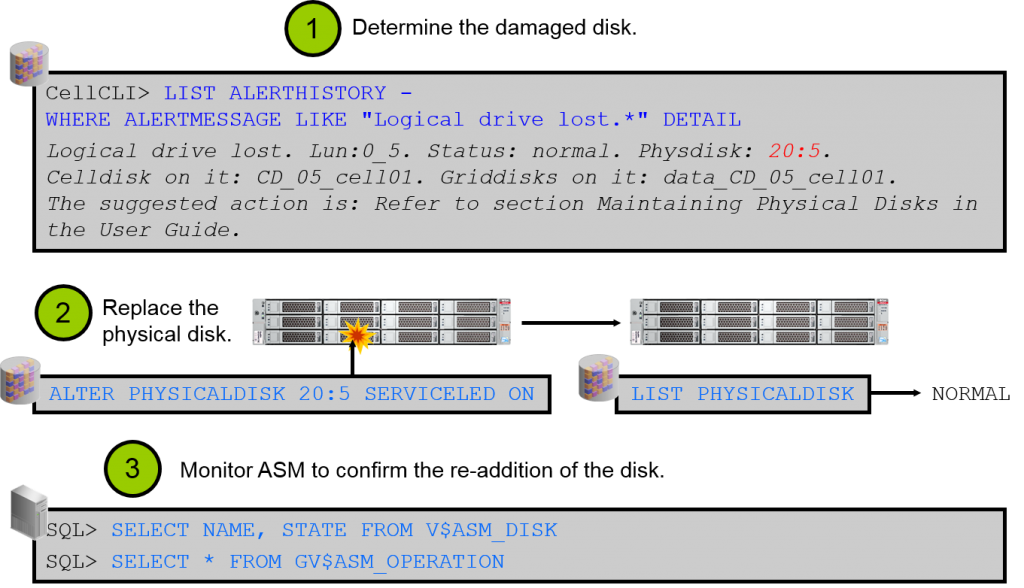
更换Storage Cell硬盘
命令行登录Cell,判断故障硬盘,例如:
CellCLI> LIST PHYSICALDISK WHERE diskType=HardDisk AND status=critical DETAIL
观察Database Server 磁盘状态
[root@dm01db01 ~]# cd /opt/MegaRAID/MegaCli/
[root@dm01db01 MegaCli]# ./MegaCli64 -Pdlist -aAll | grep “Slot\|Firmware”
观察Database Server RAID状态
[root@dm01db01 MegaCli]# ./MegaCli64 -LdInfo -lAll –aAll
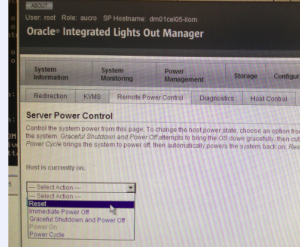
Storage Cell加电启动
远程登陆Storage Cell控制器ILOM,执行Power On,其它为系统的自动启动过程,知道Storage Cell就绪
CellCLI> LIST GRIDDISK
若没有Active,需:
CellCLI> ALTER GRIDDISK ALL ACTIVE
等grid disk Active后,ASM会自动同步,使grid disk Online,查看状态: CellCLI> LIST GRIDDISK ATTRIBUTES name, asmmodestatus
确认ASM数据自动重新分布是否已经开始或完成。 Grid用户登录+ASM实例执行:
select * from v$asm_operation; 通过EM、SYSLOG、Cellcli、ILOM查看是否有告警解除信息
检测memory ECC错误
ipmitool sel list | grep ECC | cut -f1 -d : | sort -u
若发现Exadata上存在磁盘损毁则:
使用/opt/oracle.SupportTools/sundiag.sh 收集详细信息 并发给oracle support
检测 cell server Cache Policy
cell08#  MegaCli64 -LDInfo -Lall -aALL | grep 'Current Cache Policy'
Current Cache Policy: WriteThrough, ReadAheadNone, Direct, No Write Cache if Bad BBU

cell09#  MegaCli64 -LDInfo -Lall -aALL | grep 'Current Cache Policy'
Current Cache Policy: WriteBack, ReadAheadNone, Direct, No Write Cache if Bad BBU

Default Cache Policy: WriteBack, ReadAheadNone, Direct, No Write Cache if Bad BBU
Current Cache Policy: WriteThrough, ReadAheadNone, Direct, No Write Cache if Bad BBU
Cache policy is in WB
Would recommend proactive  battery repalcement.

Example :
a. /opt/MegaRAID/MegaCli/MegaCli64 -LDGetProp  -Cache -LALL -aALL ####( Will list the cache policy)

b. /opt/MegaRAID/MegaCli/MegaCli64 -LDSetProp  -WB  -LALL -aALL ####( Will try to change teh policy from xx to WB)
     So policy Change to WB will not come into effect immediately
     Set Write Policy to WriteBack on Adapter 0, VD 0 (target id: 0) success
     Battery capacity is below the threshold value

检测cell BBU备用电池状态:
cell08# /opt/MegaRAID/MegaCli/MegaCli64 -AdpBbuCmd -GetBbuStatus -a0

BBU status for Adapter: 0

BatteryType: iBBU
Voltage: 4061 mV
Current: 0 mA
Temperature: 36 C

BBU Firmware Status:

Charging Status : None
Voltage : OK
Temperature : OK
Learn Cycle Requested : No
Learn Cycle Active : No
Learn Cycle Status : OK
Learn Cycle Timeout : No
I2c Errors Detected : No
Battery Pack Missing : No
Battery Replacement required : No
Remaining Capacity Low : Yes
Periodic Learn Required : No

Battery state:

GasGuageStatus:
Fully Discharged : No
Fully Charged : Yes
Discharging : Yes
Initialized : Yes
Remaining Time Alarm : No
Remaining Capacity Alarm: No
Discharge Terminated : No
Over Temperature : No
Charging Terminated : No
Over Charged : No

Relative State of Charge: 99 %
Charger System State: 49168
Charger System Ctrl: 0
Charging current: 0 mA
Absolute state of charge: 21 %
Max Error: 2 %

Exit Code: 0x00

批量检测BBU 信息:

dcli -g ~/cell_group -l root -t '{
uname -srm ; head -1 /etc/*release ; uptime | cut -d, -f1 ; imagehistory ;
ipmitool sunoem cli "show /SP system_description system_identifier" | grep = ;
ipmitool sunoem cli "show /SP/policy FLASH_ACCELERATOR_CARD_INSTALLED
/opt/MegaRAID/MegaCli/MegaCli64 -AdpBbuCmd -GetBbuStatus -a0 | egrep -i
'BBU|Battery|Charge:|Fully|Low|Learn' ;
}' | tee /tmp/ExaInfo.log
Exadata 停机:
1. 确认无业务访问,以root 用户登录第1 个数据库服务器节点
2. 停止数据库(详见RAC/ASM 维护之RAC 启停章节)
3. 停止Cluster
# GRID_HOME/grid/bin/crsctl stop cluster -all
4. 停除本机以外的数据库节点
# dcli -l root -c dm01db02,dm01db03,dm01db04 shutdown -h -y now
5. 停存储服务器
cell_group 可自编辑,执行时并可由root 用户读取该文件(askmac.cn)
另需参考Storage Cell 存储维护Storage Cell 停机章节信息后方可执行下述命令
# dcli -l root -g cell_group shutdown -h -y now
6. 停本机
# shutdown -h -y now
7. 此时可通过ILOM 远程关机
8. 整机下电(关PDU)
Exadata 启动
1、为机柜加电(SWITCH 自然加电)
打开PDU开关进行加电,服务器指示灯都变绿,慢闪
若需手工开机数据库服务器、存储服务器需要按住其开关5秒。
也可在ILOM中点击Cell的Poweron开关进行开机,服务器指示灯为绿色长亮,再点击DB Server
的Poweron开关进行开机,服务器指示灯为绿色长亮。
2、检查是否有黄灯报警。
3、启动数据库、应用等。
Infiniband篇
启停IBSwitch
1. InfiniBand Switch电源的开启或关闭
InfiniBand Switch提供冗余电源,分别插在Exadata的2个冗余PDU电源上,并随PDU机柜电源
开启或关闭,若关闭InfiniBand Switch需断掉InfiniBand Switch的的冗余电源。 2. 查看OEM等是否有相关报警。
ILOM无法报警
从cell1的cellcli中查看list alerthistory可以看到
3. 从db01查看网络拓扑状态
[root@dm01db01 ~]# cd /opt/oracle.SupportTools/ibdiagtools
[root@dm01db01 ibdiagtools]# ./verify-topology -t halfrack
4. 插入InfiniBand电源线,查看InfiniBand Switch正常启动
检查IB链路状态
# /opt/oracle.SupportTools/ibdiagtools/infinicheck -z
# /opt/oracle.SupportTools/ibdiagtools/infinicheck
查看IB网络拓扑状态
登陆任意Database Server,采用Exadata工具命令:
[root@dm01db01 ~]# cd /opt/oracle.SupportTools/ibdiagtools
[root@dm01db01 ibdiagtools]# ./verify-topology -t halfrack
诊断IB链路没有错误
# ibdiagnet -c 1000 -r
查看IB网络连线
以root用户登陆InfiniBand Switch ILOM,采用listlinkup命令显示:
# listlinkup
Connector 0A Present <-> I4 Port 31 is ip
….
查看IB健康状态
# showunhealthy
OK – No unhealthy sensors.
IB健康检查
env_test
IB故障处理
1. 确认已经备份IB SWITCH
2. 确认所有的cable已经label,之后从IB switch上拔下cable
3. 拔下两根电源线poweroff
4. 取出IB switch
5. 安装新IB switch
6. 恢复IB switch设置
7. Disable the Subnet Manager
Disablesm
8. 连接cable
9. 确认cable连接的正确性
/opt/oracle.SupportTools/ibdiagtools/verify-topology
10. 从任何主机上运行如下命令确认 任何link没有错误
ibdiagnet -c 1000 –r
11. Enable the Subnet Manager using
Enablesm
IB硬件监控
showunhealthy & checkpower
Switch端口错误
ibqueryerrors.pl -s RcvSwRelayErrors,RcvRemotePhysE rrors,XmtDiscards,XmtConstraint Errors,RcvConstraintErrors,ExcB ufOverrunErrors,VL15Dropped
Link状态
/usr/sbin/iblinkinfo.pl -Rl
Subnet manager
/usr/sbin/sminfo
CISCO交换机
例行维护操作
采用Cisco IOS系统命令行方式,启动终端登陆管理网口IP:telnet xxx.xxx.xxx.xxx
输入用户名(root)/口令(welcome1),进入enable模式:
查看交换机的配置 通过show命令查看:
dm01sw-ip#show running-config Building configuration…
……
显示信息包括交换机主机名称、IP地址、网关地址、IOS系统版本、时区信息、DNS配置、 NTP配置、各网络端口配置、VLAN划分(全交换机一个VLAN)配置信息等。
运行监控
通过目前 Cisco 交换机监控的规范进行监控。
由于Cisco主要用于管理网使用,当完全不能访问时,只影响管理网的相关功能,不影响业务 网的正常运行。
当出现故障后,可采用目前Cisco交换机故障处理流程进行处理,并注意交换机主机名称、IP 地址、网关地址、IOS系统版本、时区信息、DNS配置、NTP配置、各网络端口配置、VLAN 划分(全交换机一个VLAN)等信息是否正确配置。
KVM
可通过 OEM GC 插件进行监控。
PDU
故障处理
单路故障不影响Exadata的连续性运行,但需要即时报修更换(包括管理IP等),以避免另外
备份PDU也出现故障,导致Exadata非正常停机。
